Want to Install TWRP but don’t know how to do it? Today we are going to learn how to install TWRP in Zuk Z1. Lenovo is a pretty good phone and it is very useful when someone like us is techy mind here. Installing TWRP manager on Lenovo Zuk Z1 is not very easy. In this guide, we will go through some basic notes and pre-installing tips.
After making some setting changes to our phone settings, I will be telling you how to use TWRP manager and TWRP it in Lenovo Zuk Z1.
How to Set up Controlled Folder Access and Exclusions
What is TWRP Manager?
TWRP stands for Team Win Recovery Project is software for Android phones that helps us to wipe or recover data, or install any third-party firmware in our phone.
TWRP appears just like the fast boot mode in your Android phone but with a touch screen instead. It is mostly used for installing, flashing, or rooting Android devices.
Lenovo Zuk Z1 Settings before installing
So, before we start our task to download and install TWRP in Zuk Z1, we need to make some changes in the developer setting of the Lenovo Zuk Z1. Follow these steps to go to the right setting in Lenovo Zuk Z1 and make the changes-
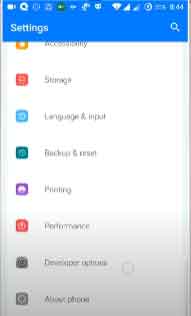
Go to your phone settings and scroll down to the bottom.
Now find out about the phone and open it.
Tap on the built number several times. It will show developer options are enabled.
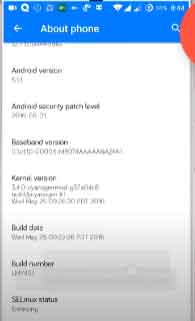
Open developer options(above About phone), then enable these two settings.
Enable advanced reboot.
Scroll down and enable OEM unlocking.
And also enable Android Debugging.
Now, that we are done with our system settings, here is how to install TWRP in Lenovo Zuk Z1.
How to Install TWRP in Zuk Z1
So, how do we install TWRP manager on our phones? First of all the concept is to download 3 files which are the TWRP.img file, then download the ADB setup, and then the last file is the Universal USB driver.
I will be providing all the links in the step-by-step guide below. Also, I will be telling you which are safe to do steps to safely boot your Zuk Z1 phone to install TWRP.
First Download the ADB setup
There are two ways to get this set up. If you want the full version of this setup you can get it from HERE. Also, you can download the minimal ADB setup. If you want to download the minimal ADB setup then please download the latest One.
Visit this link and find the latest version of Minimal ADB flash boot on your system.
Now find the Zip file and extract the file.
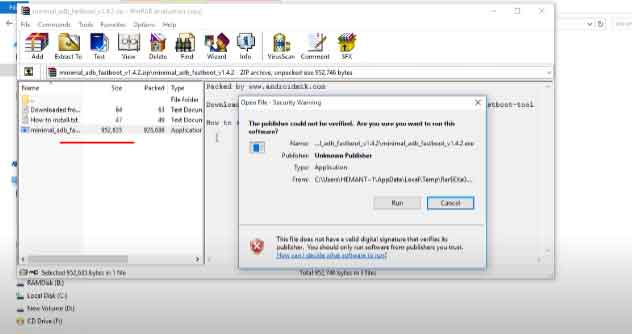
Double-click on the Minimal ADB application and go through the installation process.
On the window hit next, and next, then install the ADM flash boot.
TWRP.img file edit
After installing the ADB file setup on our Windows PC, download the TWRP.img file from this LINK.
Once you downloaded the file, Copy the file and go to the file destination of ADB setup.
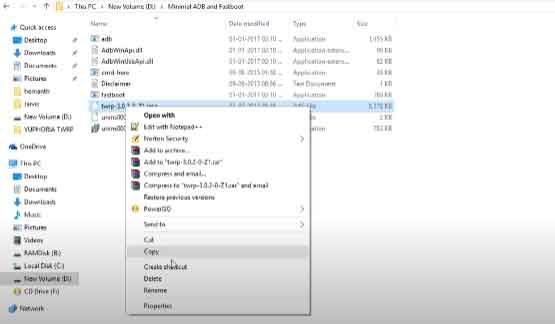
You will see a direct Minimal ADB flash boot file on the C drive if you have installed it on the C drive.
Open the folder and paste the TWRP.img file in this folder.
Open Command on this folder
In this next step, on this very folder of ADB setup, we are going to open the command prompt.
Hold shift and right-click while the ADB folder is selected.
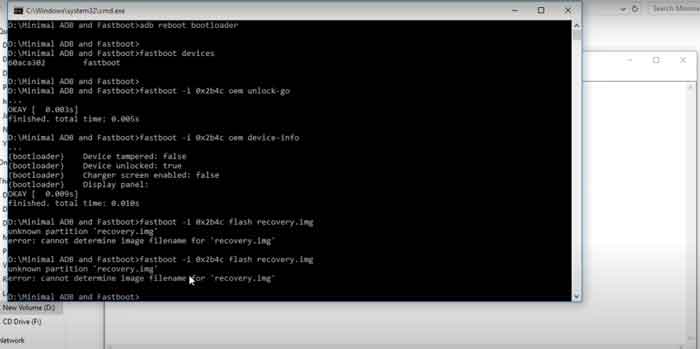
Once the command prompt pops up, make sure you make this command one after another. Here are the commands below-
adb reboot bootloader
fastboot devices
fastboot -i 0x2b4c oem unlock-go
fastboot -i 0x2b4c oem device-info
fastboot -i 0x2b4c flash recovery recovery.img
Make sure you have connected your Lenovo Zuk Z1 with your system before entering the command. Once the command is opened, do these steps one after another-
So, the first command is ADB reboot bootloader. Copy and paste it into your command and hit enter.
Once this is done, Lenovo Zuk Z1 will be booted up in fast boot mode. After this-
Now copy the second command which is fast boot devices, paste the command, and hit enter.
This will show your drivers are installed correctly and you are connected successfully.
Now we are going to unlock the bootloader by copying the 3rd command which is fastboot -i 0x2b4c oem unlock-go.
Paste the command and hit enter again.
After getting an OK message and successfully unlocking the message, copy the fourth command fastboot -i 0x2b4c oem device-info and paste then enter. It will again show that your bootloader is unlocked successfully.
Before we go to the last command, we need to rename the .img file in the ADB setup. So, rename the file to recovery.img and then continue.
Now again copy the last command fastboot -i 0x2b4c flash recovery recovery.img and paste it into the next line of the command prompt.
After this final step, you will see a message ok which means the TWRP flashing and righting recovery is successful. Next time if you boot into your system, you will see the TWRP manager pre-installed your Zuk Z1 phone.
Tip: To boot into Lenovo Zuk Z1, press the Volume up, Volume down, and Power buttons simultaneously.
Final words: So, here is a full guide on how to install TWRP in Zuk Z1. In the Lenovo Zuk Z1, TWRP is a very effective manager to manage your stuff very easily. So, next time you need any of that, simply follow this easy guide to installing TWRP in Lenovo Zuk Z1.
I hope this will help you. Please share this with someone who needs to learn this easy guide.